
Resposta Rápida: UV inkjet printing is a digital printing process in which ultraviolet-curable inks are jetted onto a substrate through piezoelectric print heads. The inks are then polymerised by exposure to UV light, producing durable, high-resolution prints directly on rigid or flexible materials. This process eliminates the need for solvent evaporation or heat drying.
According to Digital Printing: Fundamentals, Technology and Applications (edited by Kipphan, Springer, 2001) and Printing Technology (5th edition, edited by Adams, Dolin & Faux, Delmar, 2002), the instant-cure characteristic of UV inkjet systems removes the constraints of dot gain and substrate penetration that affect conventional aqueous inkjet printing. This enables crisp reproduction on non-porous substrates, such as glass, aluminium, acrylic, ceramic and leather, which are incompatible with water-based ink systems.
Introduction
Over the past two decades, the commercial printing industry’s adoption of UV inkjet technology has been one of the most significant technological shifts in the history of digital print production. While early flatbed inkjet systems were limited to paper, card and specially coated flexible substrates, UV inkjet printing has fundamentally decoupled the printing process from substrate absorbency, opening up a wide range of industrial, promotional and decorative applications that were previously the exclusive domain of screen printing, pad printing and offset lithography.
UV inkjet printers are now used in signage fabrication, packaging prototyping, personalised gift production, interior décor, architectural glass decoration and industrial component marking. They can produce output on a range of substrates, including standard corrugated board, stone tiles, carbon fibre panels and brushed stainless steel.
For those new to the process, whether working with a wide-format flatbed UV printer in a trade print environment or exploring desktop UV conversion systems for small-batch personalised products, understanding the complete production workflow is essential to achieving consistent, defect-free results. It is not simply a matter of loading a substrate and pressing print. Successful UV inkjet printing requires informed decisions about ink formulation, print head maintenance, substrate surface energy and pre-treatment, curing lamp intensity and dosage, and colour profile management.
Each of these variables interacts with the others to determine whether the finished print will have the required adhesion, colour fidelity, surface hardness and durability. This guide covers the entire process, from selecting the right equipment and preparing the substrate to setting the correct printing parameters, curing and troubleshooting common issues, drawing on current industry standards and published technical references.
What Is UV Inkjet Printing? Technology Overview
UV inkjet printing is a non-contact digital printing process. Ink droplets are ejected from piezoelectric printheads at volumes typically ranging from two to 42 picolitres. They are deposited onto a substrate surface and instantly cured by ultraviolet radiation. This radiation can come from mercury vapour UV lamps or UV LED arrays. These are mounted either adjacent to or immediately downstream of the printhead carriage.
This curing reaction involves photoinitiator molecules within the ink absorbing UV photons and generating reactive species that rapidly cross-link the monomer and oligomer components of the ink to form a solid, abrasion-resistant polymer film. This polymerisation reaction occurs in milliseconds under sufficient UV irradiance, producing a fully cured ink layer bonded to the substrate surface without the substrate needing to absorb, evaporate or otherwise process the ink vehicle.
The critical physical variable governing UV inkjet print quality is the rheological behaviour of the ink at the temperature at which it is jetted from the print head. UV-curable inks must have a viscosity of around 10–15 mPa·s at their jetting temperature (usually 40–45 °C for most commercial formulations) to ensure consistent drop formation, a stable trajectory and controlled dot spread on the substrate.
Below this viscosity window, drops become unstable and satellite formation increases, while above it, the ink resists ejection and the frequency of nozzle clogging rises sharply. Ink manufacturers achieve this rheological window by carefully selecting monomer and oligomer backbone chemistry — typically acrylate-based systems for free-radical curing and epoxide and vinyl ether systems for cationic curing — and by using temperature-controlled ink delivery systems integrated into the printhead assembly.
Equipment and Materials: What You Actually Need
The process of producing UV prints with an inkjet printer begins with selecting the appropriate equipment for the intended application, substrate range and production volume. The UV inkjet printer market broadly divides into three categories of equipment, each with a distinct capability profile.
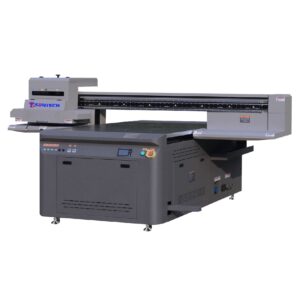
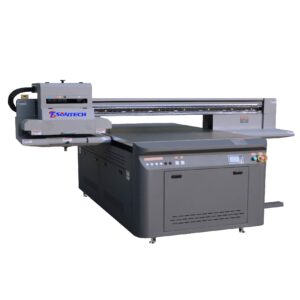
Wide-format flatbed UV printers are the dominant platform for commercial and industrial UV printing applications. These systems move a gantry-mounted print head carriage over a flat, vacuum-hold-down table. This enables direct printing on rigid substrates with a maximum defined thickness — typically 50–100 mm for industrial flatbed systems — at print widths ranging from 1.0 m to 3.2 m and beyond.
Leading platforms in this segment include the Mimaki UJF series for small-format precision work, the Durst P5 series for high-throughput commercial production, the Canon Colorado UV for hybrid flexible/rigid applications, and the EFI Vutek and Agfa Jeti series for large-format industrial output. These systems use ink sets that are specifically formulated for the print head technology of each platform — most commonly Ricoh Gen5 or Gen6, Kyocera or Konica Minolta piezoelectric heads — and should not be used with third-party ink formulations that are not on the manufacturer’s approved list, as this can cause damage to the print heads, clogging, and invalidate the service contract.
Desktop and benchtop UV inkjet printers — represented by platforms such as the Roland VersaUV LEF series, the Mimaki UJF-3042 and UJF-6042 series, and the Epson SureColor V series — are used for small-format, high-value personalisation and prototyping applications. These systems print on substrates up to approximately A3 or A2 format and are particularly suited to the decoration of promotional products, the production of samples, and short-run custom gifting, where print quality and substrate flexibility are more important than throughput.
UV-Converted Inkjet Printers are standard wide-format inkjet platforms — typically Epson EcoTank or Pro series, or Roland solvent inkjet systems — retrofitted with UV LED curing lamps and converted to operate with UV-curable ink sets. These conversion systems offer a lower entry cost but involve significant technical risk: piezoelectric print heads designed for aqueous or solvent inks may not perform reliably with UV-curable formulations of different viscosity and surface tension profiles, and curing lamp placement relative to print heads requires precise engineering to prevent premature ink cure within the head itself — a catastrophic failure mode that destroys print head assemblies.
| Industrial Flatbed (e.g., Durst P5, EFI Vutek) | Up to 3.2 m wide, 100 mm thick | 600–1,200 dpi | Rigid boards, glass, metal, stone | Mercury UV lamp or UV LED |
| Mid-Range Flatbed (e.g., Mimaki UJF-6042, Roland LEF-300) | Up to A2–A1 format, 50–153 mm thick | 900–1,200 dpi | Acrylic, wood, leather, phone cases | UV LED array |
| Wide-Format Hybrid (e.g., Canon Colorado, Agfa Jeti) | Rigid + roll media up to 3.2 m | 600–1,600 dpi | Flex banners, foam board, PVC, fabric | UV LED roll-to-roll + flatbed |
| Desktop UV (e.g., Epson SureColor V-series) | Up to 610 mm wide | 1,440–2,880 dpi | Paper, card, thin film, coated board | UV LED bar |
| Converted Inkjet (DIY UV conversion) | Varies by base system | Varies | Limited rigid; mostly coated substrates | UV LED strip retrofit |
Step-by-Step: How to Make UV Prints with an Inkjet Printer
Producing a successful UV print requires executing a defined sequence of preparation, calibration, printing, and curing steps. Shortcutting any of these steps introduces defects that are difficult or impossible to correct after curing, making process discipline the single most important operational variable in UV inkjet production.
Step 1 — Substrate Selection and Surface Energy Assessment. Before printing, verify that the target substrate has adequate surface energy to accept UV-curable ink without dewetting or adhesion failure. Most UV-curable inks require a substrate surface energy of at least 38–42 mN/m for acceptable wetting. Non-polar substrates such as polyethylene (PE), polypropylene (PP), and PTFE have inherently low surface energy (28–31 mN/m) and require surface activation treatment before printing. Use a dyne test pen set (available in increments from 30 to 72 mN/m) to verify pre-treatment effectiveness before running production.
Step 2 — Substrate Pre-Treatment. For low-energy substrates or for applications requiring maximum adhesion, apply the appropriate pre-treatment: corona discharge or atmospheric plasma treatment for plastics (increasing surface energy to ≥44 mN/m), primer or adhesion promoter coating for glass and metals, isopropyl alcohol (IPA) surface wipe for removal of mould-release agents and contamination from rigid substrates, and UV primer undercoat (typically a clear UV-curable primer ink) for substrates with aggressive surface textures where direct ink adhesion is marginal.
Step 3 — ICC Colour Profile Selection and RIP Configuration. Load the substrate-specific ICC colour profile in your RIP software (Wasatch SoftRIP, Onyx PosterShop, Caldera, or the manufacturer’s proprietary RIP). Select the ink volume curve (linearisation) calibrated for the substrate’s surface energy and absorption characteristics. Configure white ink underprint layers if printing on transparent, translucent, or dark substrates — white ink workflow management is one of the most technically complex aspects of UV inkjet production and requires substrate-specific opacity and choke settings.
Step 4 — Print Head Maintenance and Nozzle Check. Print a nozzle check pattern before every production run and verify that all channels show full nozzle firing without gaps or misdirected jets. UV-curable inks are significantly more prone to nozzle clogging than aqueous inks due to their higher viscosity and photoinitiator chemistry — even brief exposure to ambient UV light during handling can initiate partial curing in the print head manifold. Run a print head purge cycle if any nozzle defects are observed, and verify nozzle health again before committing production substrate.
Step 5 — Print and Cure. Execute the print job from the RIP at the calibrated pass count, resolution, and speed settings. Verify that the UV curing lamps (or UV LED arrays) are operating at the specified irradiance level — typically 1,000–3,000 mW/cm² for mercury UV lamps, or 8–20 W/cm² for UV LED systems — by checking the lamp power readout or performing a periodic dosimeter measurement with a UV radiometer. After printing, verify cure completeness by fingernail scratch test (a fully cured surface should show no ink displacement under moderate fingernail pressure) and, for critical applications, by cross-hatch adhesion test per ISO 2409.
Substrate Preparation and Pre-Treatment
The interface between UV-curable ink and substrate surface is the most technically demanding aspect of UV inkjet printing because it involves the intersection of ink chemistry, substrate surface physics, and mechanical adhesion mechanisms that vary significantly across the substrate material classes commonly printed with UV inkjet systems. Unlike aqueous inkjet inks, which penetrate porous substrates and achieve adhesion partly through mechanical interlocking of ink polymer with substrate fibres, UV-curable inks form a cross-linked polymer film on the substrate surface that adheres primarily through polar molecular interactions and, where applicable, chemical bonding between the ink’s adhesion-promoting components and the substrate’s surface chemistry.
For glass substrates — one of the most commercially important categories for UV inkjet decoration — surface preparation typically involves a three-stage protocol: solvent cleaning with IPA or acetone to remove surface oils and fingerprints; application of a silane coupling agent (typically a methacryloxy-functional silane such as 3-MPS, diluted to 0.5–1.0% in IPA) to create a covalent chemical bridge between the glass silanol groups and the acrylate ink chemistry; and, for multi-colour applications, a UV-curable clear primer undercoat to level microscopic surface roughness and optimize ink spread. When these steps are followed correctly, UV inkjet prints on glass can achieve cross-hatch adhesion ratings of 0 (zero defect) per ISO 2409, with outdoor durability exceeding two years without lamination in standard UV exposure conditions.
For metal substrates — aluminium, stainless steel, anodized aluminium, and powder-coated metal panels — the primary pre-treatment variables are surface cleanliness and surface energy. Industrial metal panels frequently carry residual mould-release agents, protective film adhesive residue, or passivation coatings that dramatically reduce surface energy. A standard pre-treatment sequence for aluminium begins with mechanical surface abrasion using a non-woven abrasive pad (Scotch-Brite equivalent) to create micro-scale anchor points, followed by IPA wipe and air drying, followed by atmospheric plasma or primer application immediately before printing — minimizing the recontamination window that occurs within minutes of plasma treatment as atmospheric hydrocarbons re-adsorb onto the activated surface.
| Glass | 70–72 mN/m (high, but chemically inert) | Silane coupling agent (3-MPS in IPA) | Chemical bonding established | UV clear primer overcoat |
| Aluminium | 40–45 mN/m | IPA wipe + atmospheric plasma | ≥ 55 mN/m | Metal adhesion primer |
| Acrylic (PMMA) | 38–40 mN/m | IPA wipe or light plasma | ≥ 44 mN/m | Optional UV primer |
| Polypropylene (PP) | 28–31 mN/m (low — critical) | Corona or plasma treatment | ≥ 44 mN/m | PP adhesion primer required |
| Ceramic / Stone | Variable (50–65 mN/m) | Solvent clean + plasma | Maintained ≥ 50 mN/m | UV primer for porous surfaces |
| Coated PVC (rigid) | 36–40 mN/m | IPA wipe | ≥ 42 mN/m | Generally not required |
| Wood / MDF | 40–50 mN/m (varies with sealing) | Sand + seal with UV primer | Controlled by primer layer | UV sealer coat required |
| Leather | 30–36 mN/m | IPA wipe + UV primer | ≥ 42 mN/m | UV-flexible primer is required. |
Ink Curing: UV Lamp vs. UV LED Systems
The curing unit is arguably the most technically nuanced component of a UV inkjet system, and the choice between mercury-vapour UV lamp technology and UV LED curing technology has significant implications for print quality, operating cost, substrate compatibility, and ink formulation selection. Mercury UV lamps emit a broad-spectrum UV output spanning wavelengths from approximately 200 nm to 450 nm, with characteristic emission peaks at 254 nm, 313 nm, 365 nm, and 405 nm.
This broad spectrum efficiently activates a wide range of photoinitiator chemistries within the ink, making mercury UV systems highly compatible with legacy UV ink formulations and capable of curing thick, heavily pigmented layers that challenge narrower-spectrum UV LED systems. However, mercury UV lamps generate substantial heat — both infrared radiation and convective heat from the lamp housing — that can cause thermal distortion of heat-sensitive substrates such as thin films, expanded PVC foam board, and heat-shrink labelling materials.
UV LED curing systems emit narrow-band UV radiation centred on specific wavelengths — most commonly 365 nm, 385 nm, or 395 nm — matching the peak absorption wavelength of the photoinitiator systems formulated specifically for LED curing. UV LED systems produce negligible infrared heat output, enabling printing on heat-sensitive substrates that mercury UV lamps cannot safely process. UV LED arrays also offer substantially longer service life (typically 10,000–30,000 hours versus 1,000–2,000 hours for mercury UV lamps), lower energy consumption, instant on/off capability, and elimination of the warm-up and cool-down cycles required by mercury UV systems.
The trade-off is narrower photoinitiator compatibility: LED-curable ink formulations must be specifically engineered with photoinitiators that absorb efficiently at the narrow LED emission wavelength, and substituting non-LED-optimized ink into an LED curing system will produce under-cured prints regardless of lamp power level — a critical incompatibility that operators upgrading from mercury UV to LED UV systems must explicitly manage during ink inventory transition.
Troubleshooting Common UV Print Defects
Even when using correctly specified equipment and materials, defects in UV inkjet production are common and experienced operators learn to diagnose and correct them systematically. The most serious defect category is ink adhesion failure, which manifests as peeling, flaking, or complete delamination of the ink layer during or after curing. This is almost always attributable to one of three root causes: insufficient substrate surface energy (verify this with dyne test pens before and after pre-treatment), incompatible ink-to-substrate chemistry (confirm that the ink is qualified for the substrate material class by checking the compatibility data provided by the ink manufacturer), or under-curing (verify the UV lamp irradiance with a calibrated radiometer and check the lamp age against the specified lamp life provided by the manufacturer). Attempting to resolve adhesion failure by increasing ink volume or reducing print speed without first diagnosing the root cause will typically produce an even more severe adhesion defect in the same location.
Wrinkling or an orange-peel texture on the surface of the cured ink film is caused by the outer surface of the ink layer curing faster than the underlying ink body. This creates a skin that buckles as the internal ink volume continues to contract during polymerisation. This defect is most common with high-viscosity inks, aggressive curing lamp settings, or dark-coloured inks that absorb UV energy in the surface layer before it can penetrate the bulk of the ink. Reducing the intensity of the curing lamp while maintaining an adequate total UV dose (by slowing the carriage speed) allows for a more uniform depth of cure, thereby minimising wrinkling. Colour gamut inconsistency between substrates is a natural consequence of different surface energies producing different ink dot spread values — a calibration issue resolved by creating substrate-specific ICC colour profiles rather than applying a single universal profile to all substrates.
Industry Standards and Print Quality Benchmarks
The quality of UV inkjet printing and the performance of the ink are governed by several internationally recognised standards that provide objective benchmarks for adhesion, colour accuracy, outdoor durability and chemical resistance. ISO 2409 (Cross-Cut Test for Film Adhesion) is the foundational standard for assessing adhesion in UV inkjet quality control. A rating ranging from 0 (no detachment) to 5 (severe detachment) provides a reproducible and substrate-independent measure of the quality of ink adhesion to the substrate. ISO 11664-4 defines the CIELab colour measurement methodology used to verify colour accuracy between proof and production output, as well as between different substrates. ASTM D4329 (UV Weathering Exposure Cycles for Plastics) and ISO 4892-2 provide the accelerated UV weathering test protocols that UV inkjet ink manufacturers use to generate outdoor durability data, which is typically expressed as the number of years of equivalent outdoor exposure in conditions similar to those in South Florida or Arizona. This data appears in their technical data sheets.
For outdoor UV inkjet signage applications, the industry baseline expectation for unlaminated UV inkjet output on quality-coated substrates is a minimum colour stability of three to five years under direct outdoor exposure in temperate climates, while laminated output achieves five to seven years in equivalent conditions. To achieve these durability targets, qualified UV ink formulations with UV-stable pigments are required, as well as substrates that are rated for outdoor exposure. Not all rigid substrates used in UV inkjet production are UV-stable; therefore, printing on non-UV-stabilised PVC or acrylic with outdoor-rated UV ink will not produce the full outdoor durability that the ink formulation is capable of delivering on a qualified substrate.
Frequently Asked Questions
Q1: Can a regular inkjet printer be converted to UV printing?
A standard consumer or office inkjet printer cannot be reliably converted to UV printing because its print heads are designed for the viscosity range of aqueous inks (1–5 mPa·s), whereas UV-curable inks jet at 10–15 mPa·s — a viscosity range that will cause chronic nozzle clogging and inconsistent drop formation in heads not engineered for it. Professional UV conversion kits exist for specific wide-format Epson and Roland platforms, but these involve print head replacement or qualification by the system supplier, not simple ink substitution.
Q2: What substrates can a UV inkjet printer print on?
UV inkjet printers are compatible with an exceptionally broad substrate range including rigid materials (glass, acrylic/PMMA, aluminium, steel, wood, MDF, ceramic, stone, foam board, carbon fibre panels) and flexible materials (PVC film, polypropylene film, polyester, leather, textured wallcovering, and coated paper). The limiting factor is substrate surface energy — materials with surface energy below 38 mN/m (such as untreated polyethylene or PTFE) require plasma or corona pre-treatment before printing to achieve acceptable ink adhesion.
Q3: How durable are UV inkjet prints?
Fully cured UV inkjet prints on qualified substrates offer significantly higher abrasion resistance, chemical resistance, and UV stability than aqueous or solvent inkjet prints without additional lamination. Outdoor-rated UV inkjet output on quality-coated rigid substrates typically achieves three to five years of outdoor colour stability unlaminated, extending to five to seven years with UV-protective overlaminate. Indoor UV prints on hard surfaces such as glass, acrylic, and metal may remain visually defect-free for ten or more years under normal interior lighting conditions.
Q4: What is the difference between UV inkjet printing and UV DTF printing?
UV direct-to-film (DTF) printing is a variant of UV inkjet technology in which UV-curable ink is printed onto a release-coated PET film (rather than directly onto the final substrate), cured, and then transferred to the target surface using heat and pressure. UV DTF is suited to curved, uneven, or very small substrate surfaces that cannot be accommodated on a flatbed printer bed, trading the direct-print quality ceiling of flatbed UV printing for the geometric flexibility of a transfer process.
Q5: Why is white ink important in UV inkjet printing?
White ink in UV inkjet printing serves as an opaque underprint base on transparent, translucent, or dark substrates — without it, colours printed on clear acrylic, glass, or black foam board appear washed out or invisible against the substrate background. White ink management is technically complex: it requires careful opacity calibration, choke (shrink) settings to prevent white from showing at colour edges, and separate cure passes in some workflows, making it one of the most frequently troubleshot aspects of UV inkjet production.
Q6: What causes UV prints to crack or peel after curing? Post-cure cracking and peeling in UV inkjet prints are typically caused by over-cure (excessive UV dose causing the ink film to become brittle through over-cross-linking), ink-substrate thermal expansion mismatch (the cured ink film expanding and contracting at a different rate than the substrate during temperature cycling), or inadequate ink flexibility for the substrate application — flexible substrates such as leather, thin film, and flexible PVC require UV ink formulations containing flexible oligomers (such as aliphatic polyurethane acrylates) that remain pliable after cure rather than forming a rigid, brittle cross-linked network.
Conclusão
UV inkjet printing is a technically sophisticated and mature process that offers a combination of substrate versatility, print durability and production speed unmatched by any other digital printing technology across its range of applications. Producing successful UV prints with an inkjet printer requires a disciplined approach at every stage of the workflow, from assessing the surface energy of the substrate and pre-treatment to managing ICC profiles, maintaining nozzles, verifying the curing lamp, and testing post-cure adhesion. Those who invest time in understanding the underlying ink chemistry and physics of each process variable will find that UV inkjet printing rewards technical precision with excellent, consistent output quality, minimal waste, and substrate compatibility that opens up commercial applications well beyond the scope of conventional digital printing. As UV LED curing technology matures and ink formulations expand to cover an ever wider range of substrates, the UV inkjet printer is becoming the production platform of choice for differentiated, high-value print applications in signage, décor, packaging and industrial marking.